How to setup Microsoft Azure Face Scan
- As a carbonate user, avail the face-recognition feature to monitor staff attendance.
- There are two main things you need to do in order to activate this feature. One is the subscription key and the other is an endpoint for the Face API subscription.
- Kindly follow these steps below to implement the same in carbonate:
Step 1.
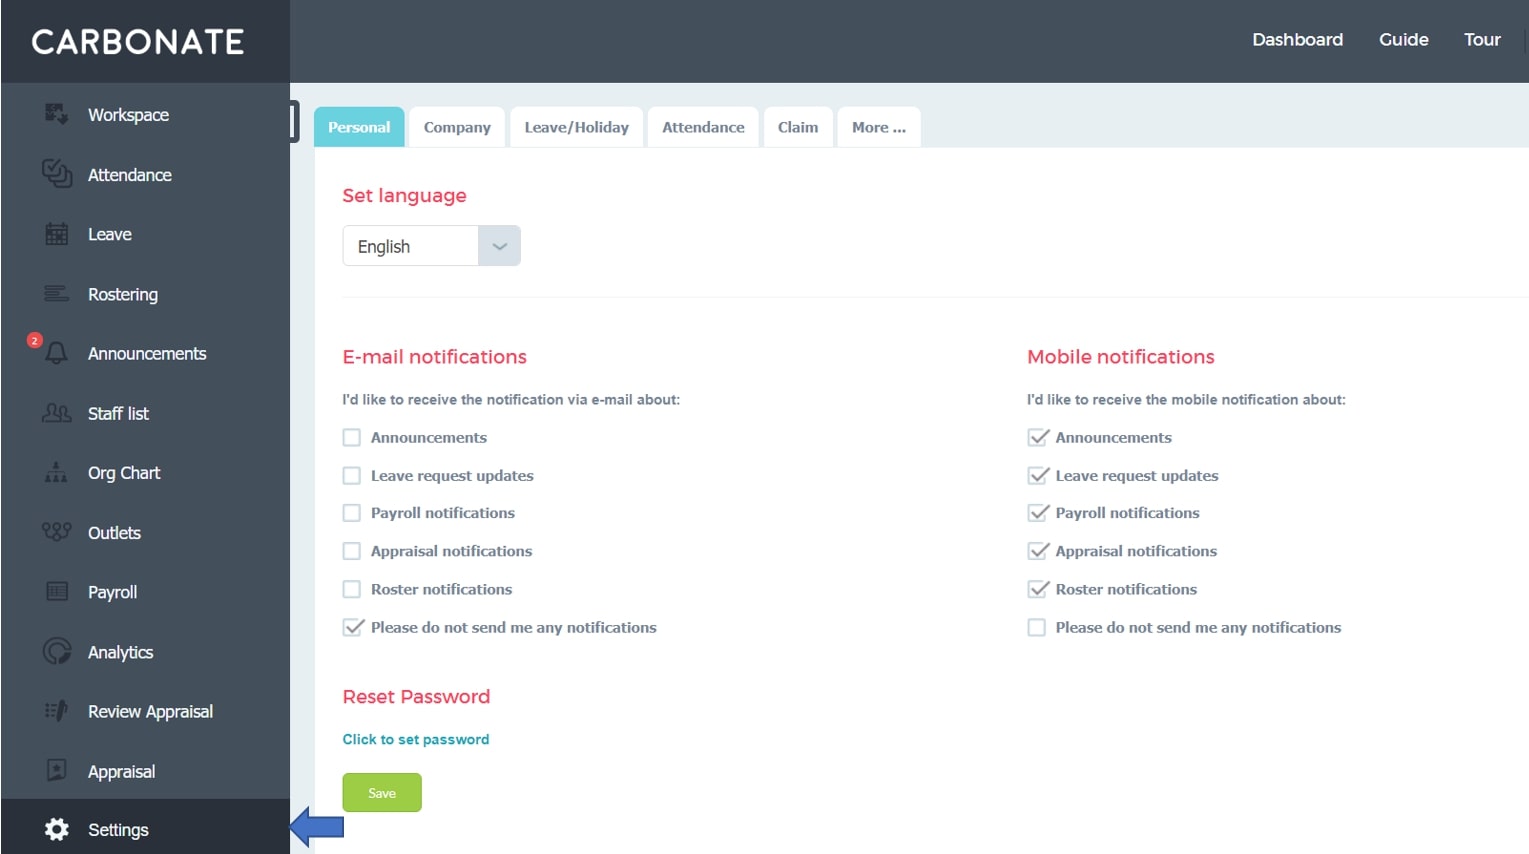
- Please log into carbonate and go to the settings page.
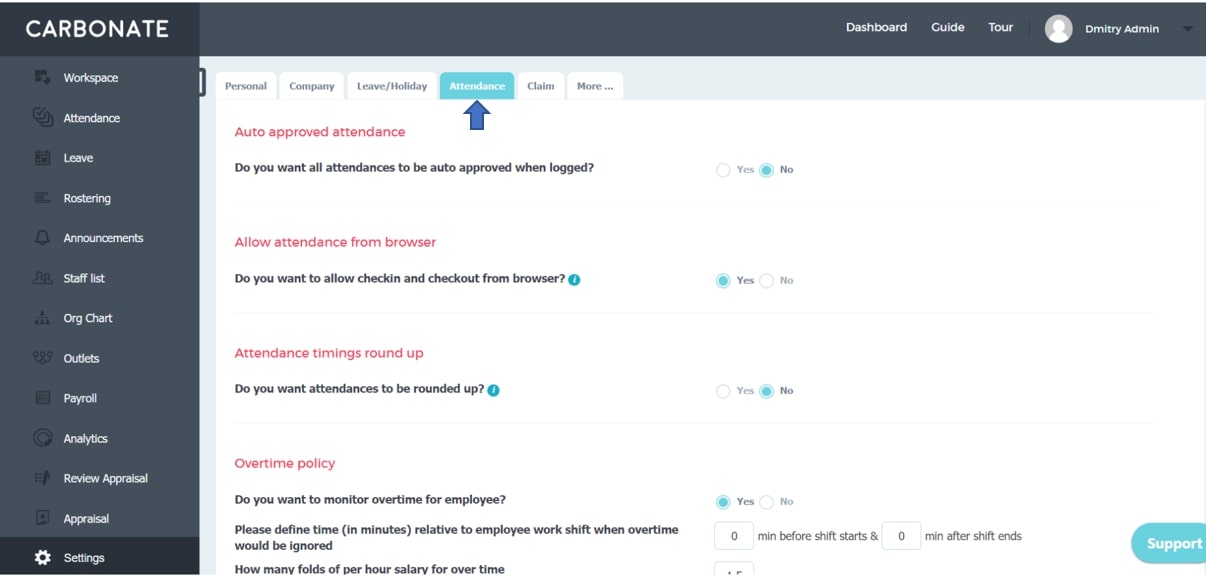
Step2.
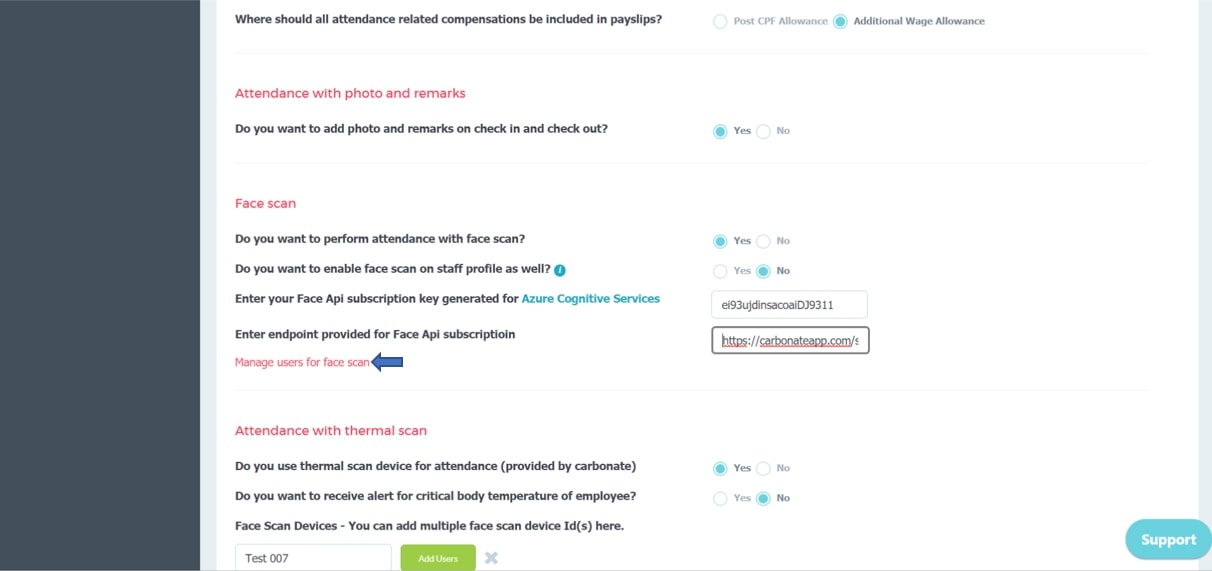
- Kindly go to the attendance options on the settings page.
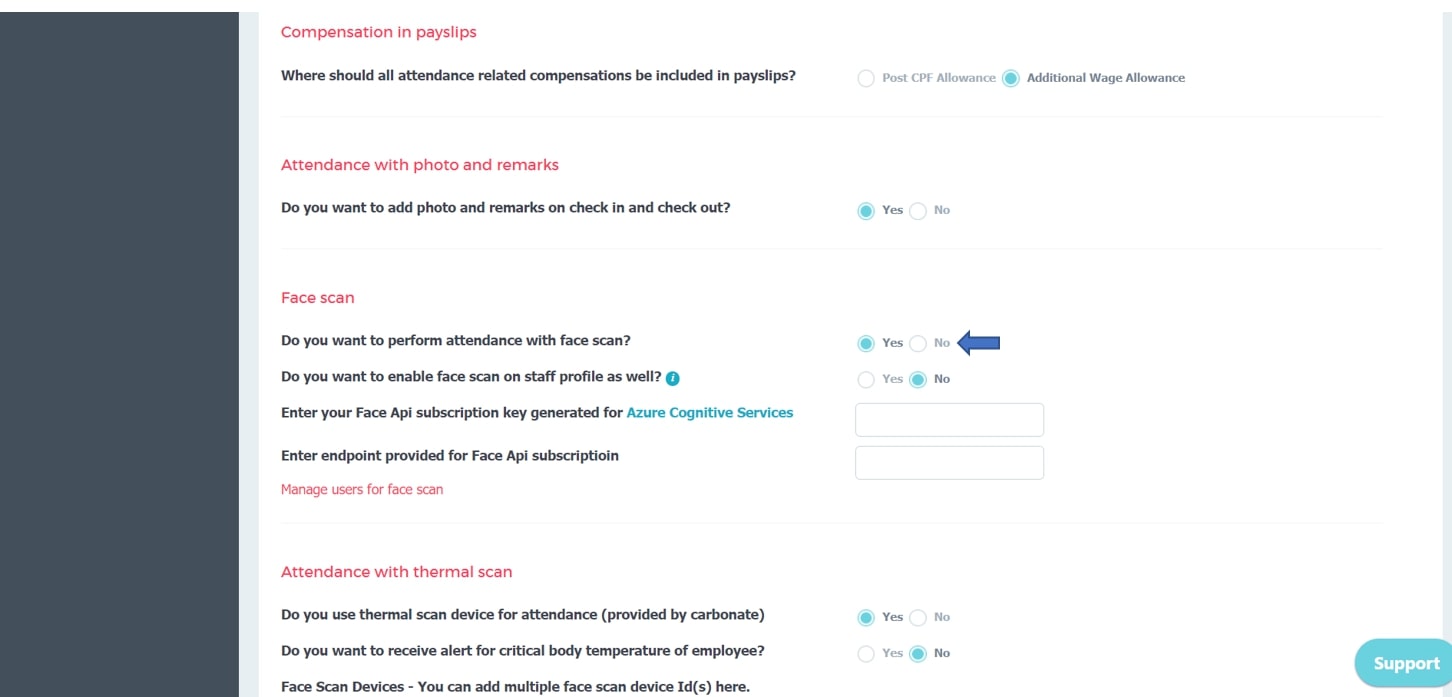
Step 3.
- Please enable “Do you want to perform attendance with face scan?”
- Kindly follow the below process to activate the face scan feature:
Step1.
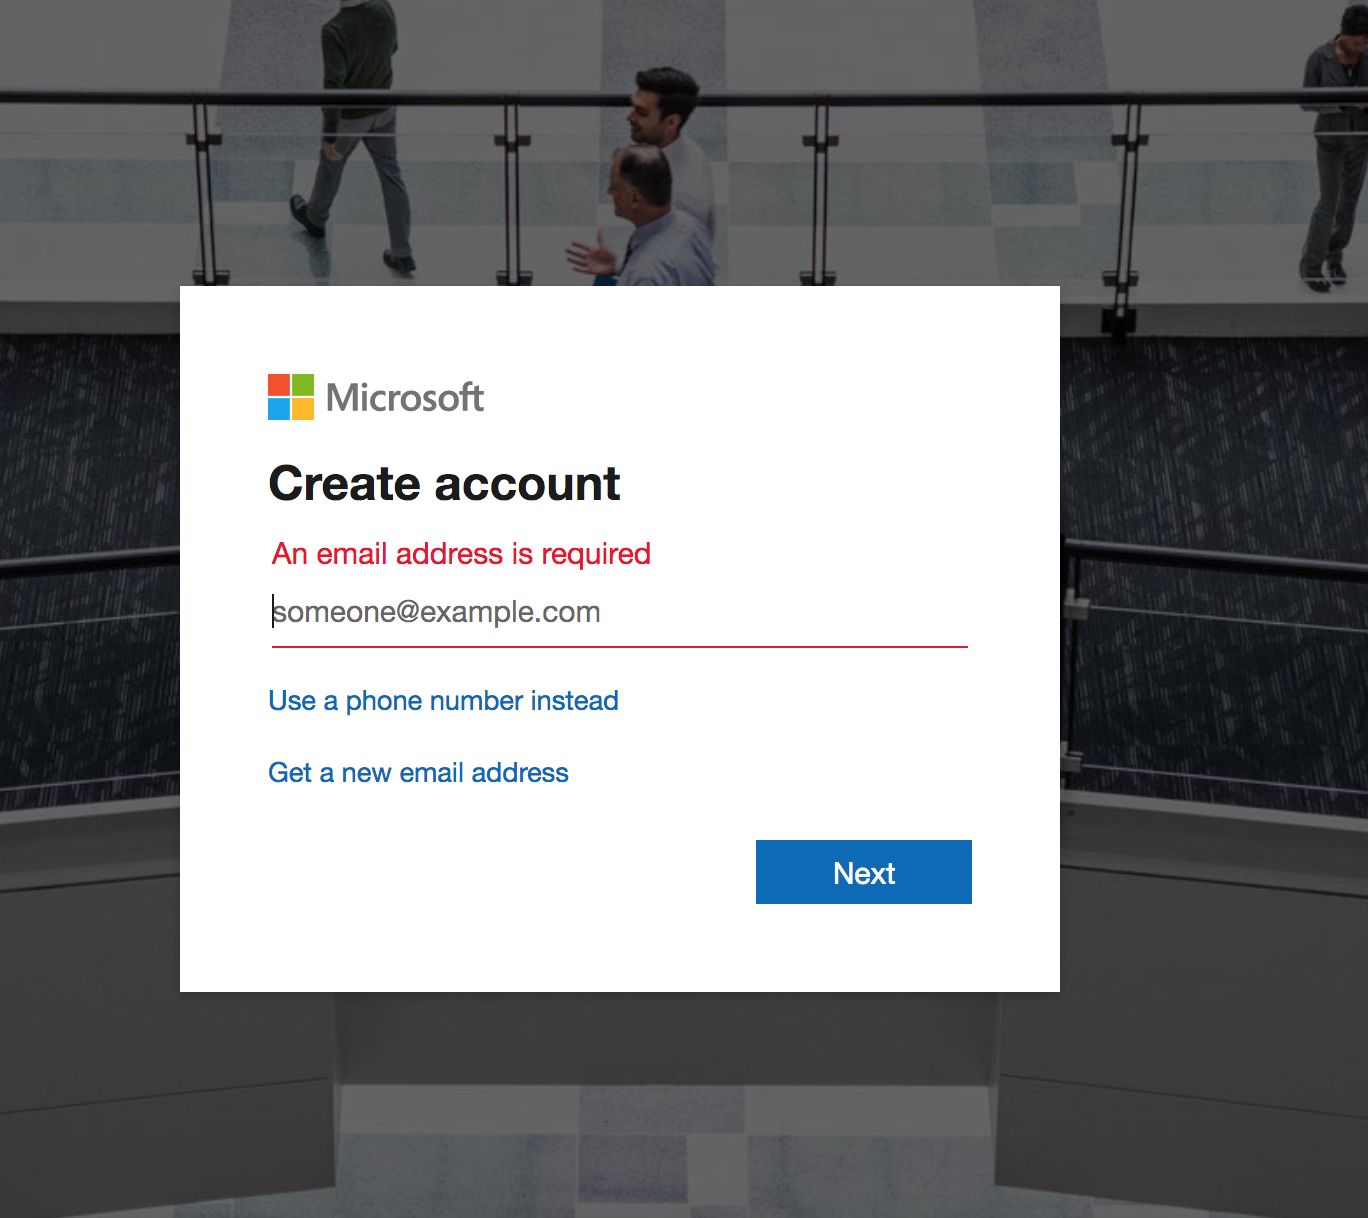
- Create a Microsoft outlook account with these steps below:
- If you already have an outlook account, you can login directly with your credentials.
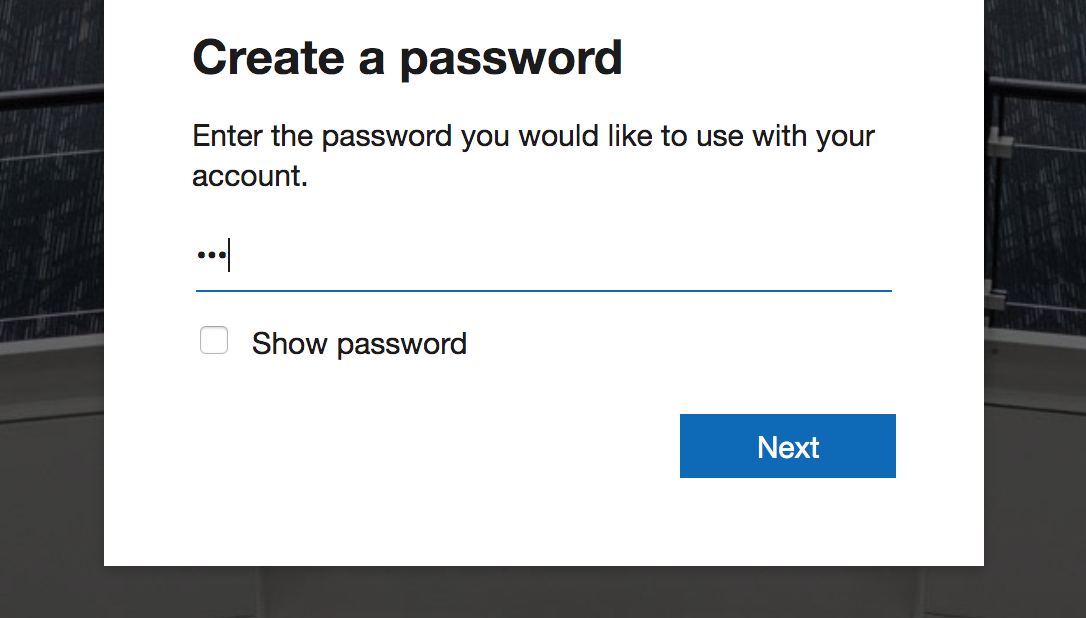
Step 1 a.
.
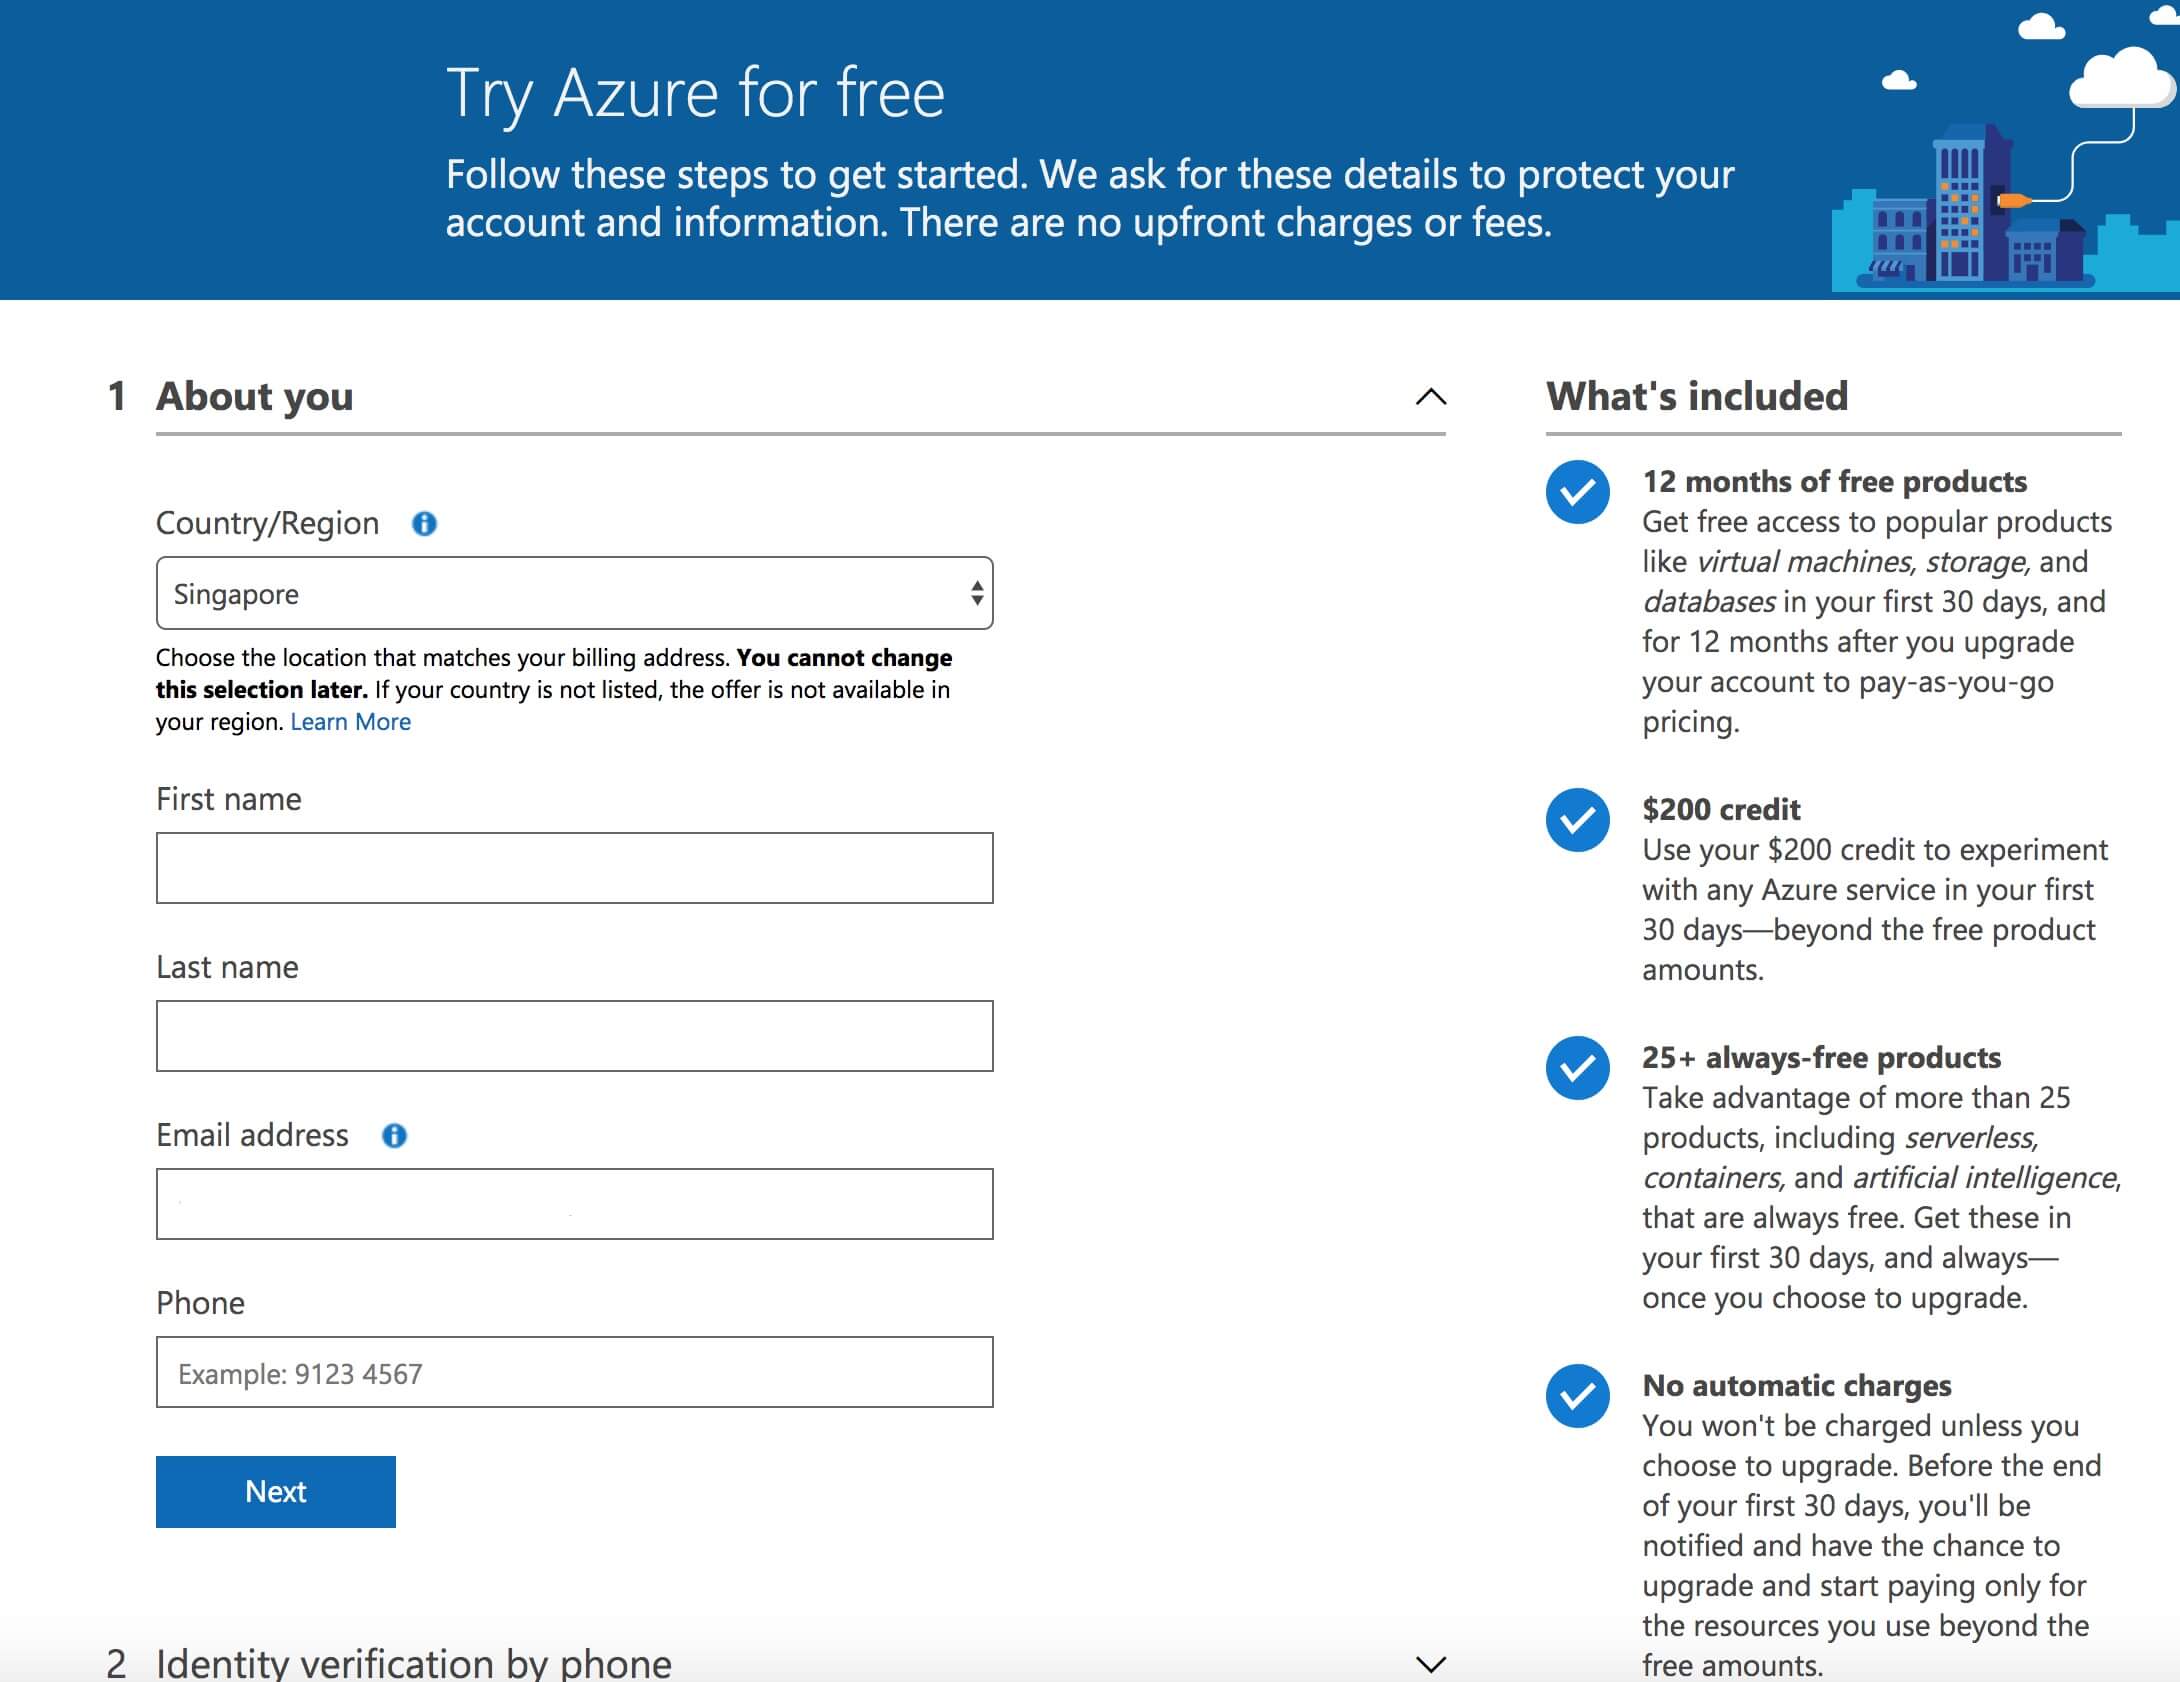
Step 2.
- Fill in the form to complete Microsoft Azure sign up. Please make sure you select the correct region as per your location.
Step 3.
- Next, you will be required to verify your phone number, enter card details and accept all agreements.
Step 4.
- Go to the Microsoft Azure portal from any of the two following links.

Step 4 a.
.

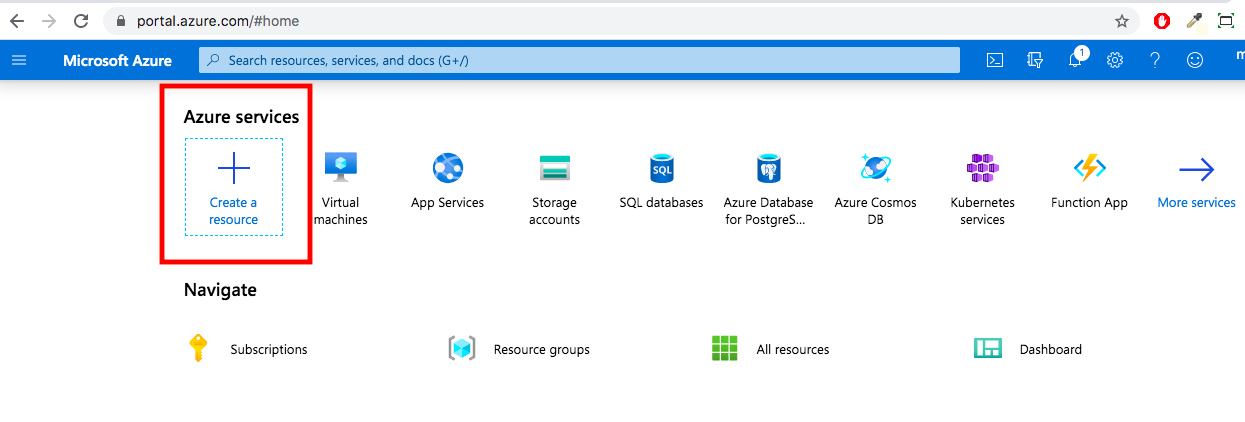
Step 5.
- on portal home page, click on “create a resource”.
Step 6.
- Please select Face options from the drop down list.
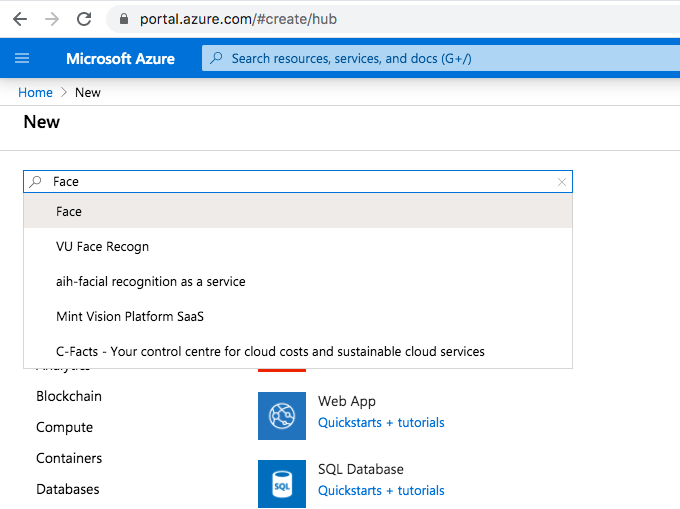
Step 7.
- Click on “create” to start the set up.
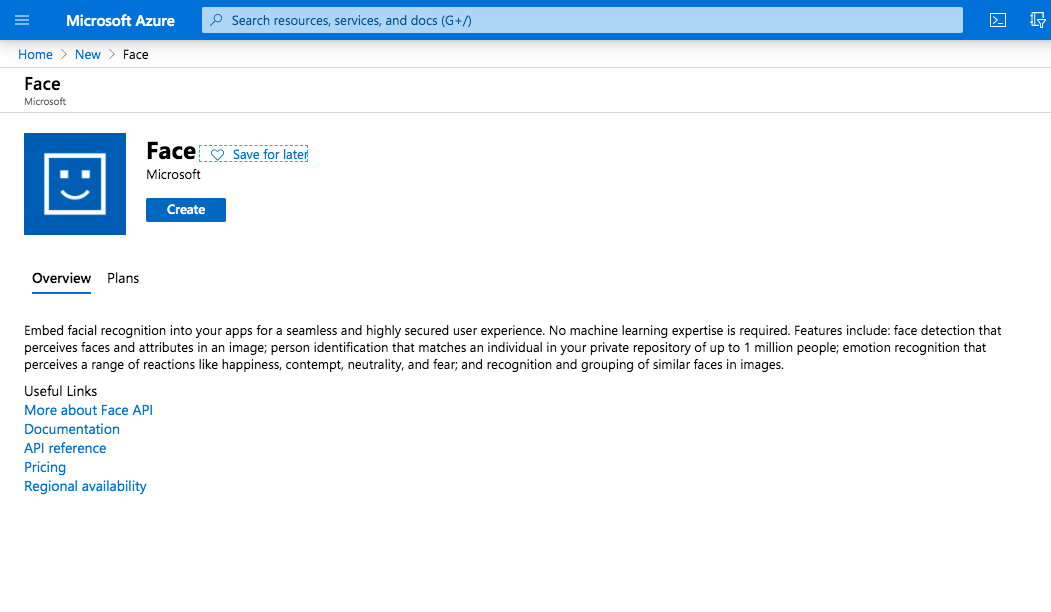
Step 8.
- Fill in the required details to complete the set up.

Step 9.
- After completing the set up, wait for some moment for deployment to complete. You will be redirected after completion.

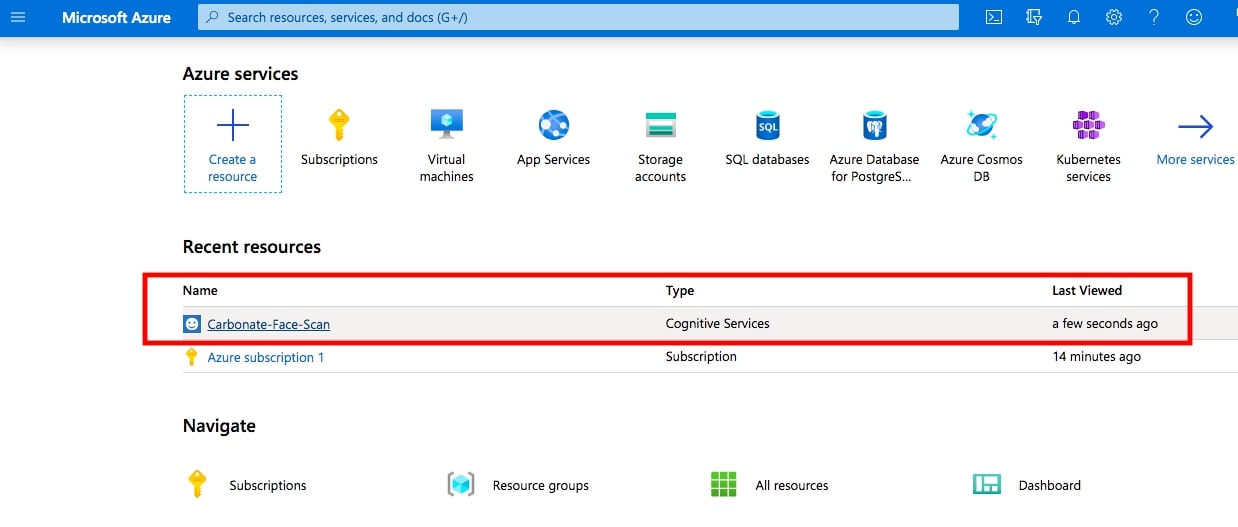
Step 10.
- From the recent resources click on resource you just created to access the key and endpoint.
Step 11.
- In the detail page you will see the endpoint generated as per your selected region. Also a link to manage the keys. Click on the link to access the keys.
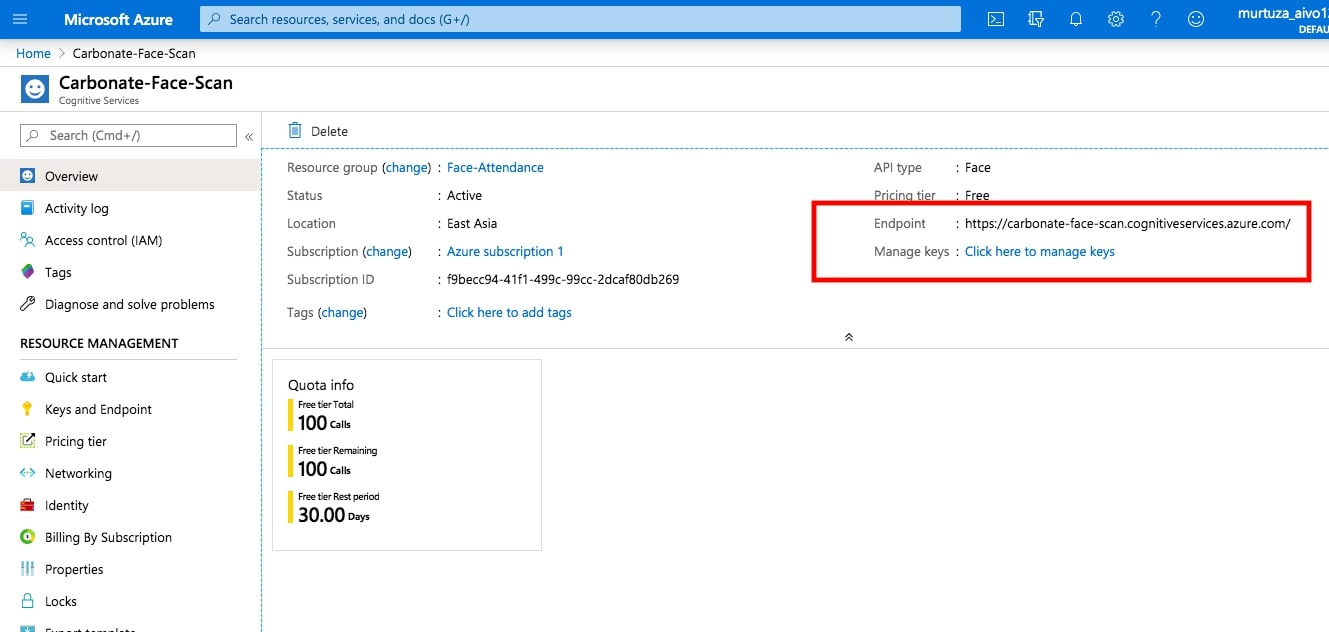
Step 12.
- Finally copy the endpoint URL and any one of generated key and paste it at the Carbonate face scan setting fields.

Step 13.
- Click on manage users in attendance section for face scan and add the profile.
Step 13 a.
.
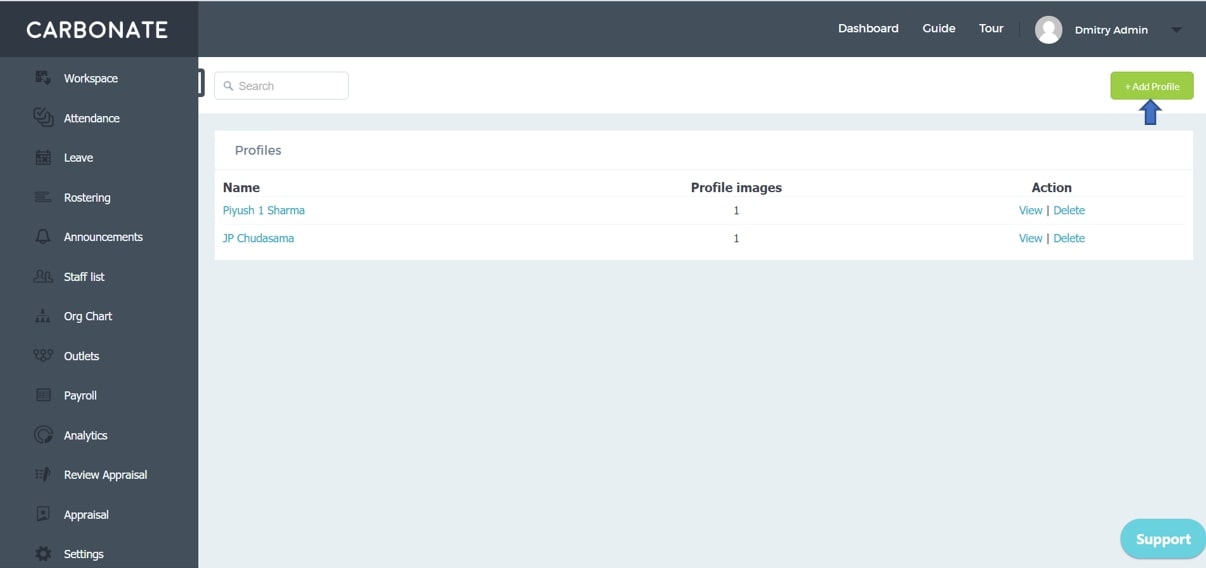
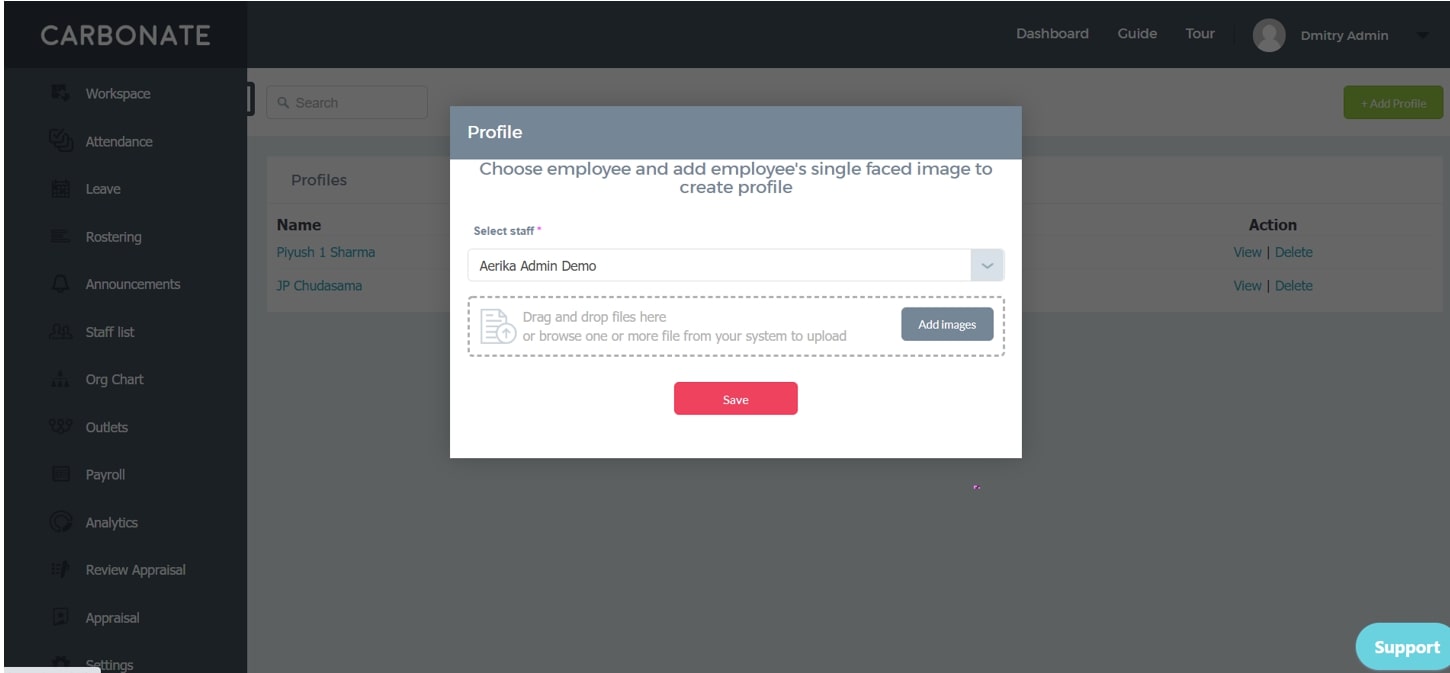
Step 14.
- Select the particular staff and add images for facial detection and click on save.
Step 15.
- Once the image is added in the system, from next time it will detect facial image for the staff and attendance will be performed accordingly.
Face Scan Set up
You can watch the video here:
Related User Guides